Category: ONIE

  • Building ONIE with DUE

    Howdy everyone, been a while since I’ve had a post but this one is long overdue.

    I’m still working in Networking, and every once in a while, I need to update the ONIE software on a switch, or even create a KVM version for GNS3 so that I can test latest versions of NOS’s.

    Well, a lot has changed and improved since I had to do this. ONIE now has a build environment using DUE, or Dedicated User Environment. Cumulus has made this, and it is in the APT repos for Ubuntu and Debian. This does make building much easier as trying to build a build machine with today’s procedure from OCP’s GitHub repo is 100% broken and doesn’t work. They still ask to use Debian 9, which most of the servers hosting packages have been retired since Debian 9 has EOL’d. I’ve tried with Debian 10, only to have packages not be supported. So I found out about DUE and was having issues with that, but after much searching and reading, I finally found a way to build ONIE images successfully and consistently.

    Just a slight Caution: At the rate of change with ONIE, this procedure can change again. I will either update this blog or create a new one when necessary.

    So, lets get to building!

    The first thing I did, was install Docker and DUE on my Ubuntu 22.04.4 server

    sudo apt update
    sudo apt install docker.io
    sudo usermod -aG docker $USER
    logout

    I then log back in to the server so that my new group association takes place and install DUE

    sudo apt update
    sudo apt install due
    

    I then installed the ONIE DUE environment for Debian 10. From my research this one is the most stable and worked the best for me:

    due --create --from debian:10 --description "ONIE Build Debian 10" --name onie-build-debian-10 \
    --prompt ONIE-10 --tag onie --use-template onie

    This download and sets up the build environment to build ONIE based on Cumulus’s best practices. Once this process is complete, we now get into the environment with the following command:

    due --run -i due-onie-build-debian-10:onie --dockerarg --privileged

    You are now in the Docker Container running Debian 10 and has the prerequisites for building ONIE already installed. Now we need to clone the ONIE repo from GitHub and do some minor settings to make sure the build goes smoothly.

    mkdir src
    cd src
    git clone https://github.com/opencomputeproject/onie.git

    I then update the git global config to include my email address and name so that during the building process when it grabs other repos to build, it doesn’t choke out and die and tell me to do it later:

     git config --global user.email "wililupy@lucaswilliams.net"
     git config --global user.name "Lucas Williams"

    So, I am building for a KVM instance of ONIE for testing in GNS3. First thing I need to do is build the security key

    cd onie/build-config/
    make signing-keys-install MACHINE=kvm_x86_64
    make -j4 MACHINE=kvm_x86_64 shim-self-sign
    make -j4 MACHINE=kvm_x86_64 shim
    make -j4 MACHINE=kvm_x86_64 shim-self-sign
    make -j4 MACHINE=kvm_x86_64 shim

    I had to run the shim-self-sign after the shim build option again to create self-signed shims after creating the shim, and then had to run shim again to install the signed shims in the correct directory so that ONIE build would get pass the missing shim files.

    Now we are ready to actually build the KVM ONIE image.

     make -j4 MACHINE=kvm_x86_64 all

    Now, I’m not sure if this is a bug or what, but I actually had to run the previous command about 10 times after every time it completed, because it didn’t actually complete. I would just press UP on my keyboard arrow key to re-run the previous command, and I did this until I got the following output:

    Added to ISO image: directory '/'='/home/wililupy/src/onie/build/kvm_x86_64-r0/recovery/iso-sysroot'
    Created: /home/wililupy/src/onie/build/images/onie-updater-x86_64-kvm_x86_64-r0
    === Finished making onie-x86_64-kvm_x86_64-r0 master-06121636-dirty ===
    $

    I then ran ls ../build/images to verify that my recovery ISO file was there:

    $ ls ../build/images
    kvm_x86_64-r0.initrd       kvm_x86_64-r0.vmlinuz.unsigned
    kvm_x86_64-r0.initrd.sig   onie-recovery-x86_64-kvm_x86_64-r0.iso
    kvm_x86_64-r0.vmlinuz      onie-updater-x86_64-kvm_x86_64-r0
    kvm_x86_64-r0.vmlinuz.sig
    $

    I then logged out of the DUE environment and my ISO was in my home directory under the src/onie/build/images/onie-recovery-x86_64-kvm_x86_64-r0.iso file. From here I was able to upload it to my GNS3 server and create a new ONIE template and map the ISO as the CD-ROM and created a blank qcow2 hard disk image to use the recovery and build the image to use on my GNS3.

    One thing to note is that this procedure is for building the KVM version of ONIE. To build others, just change the MACHINE= variable to be what ever platform you are building for.

    Good luck and let me know in the comments if this worked for you.
  • Deploying Whitebox Switch ONIE images with MAAS

    Hello,

    So I spend a lot of time deploying switches in my lab for my job. I also really like Canonical’s tools for managing infrastructure and bare metal servers called MAAS, or Metal-As-A-Service. It can deploy servers better than really any other solution I have used in the past, including Red Hat’s Satellite, Microsoft’s Windows Deployment Services (WDS) and Solaris’s Jumpstart server. The  thing I particularly like is that it is OS agnostic. Meaning even though it is a Canonical product, it is not restricted to just Ubuntu. I can setup MAAS to deploy any, Operating system to my bare metal, as long as I have an image for it. So I can deploy Red Hat and Windows as well.

    So I was thinking, how hard would it be to make MAAS deploy ONIE images on Bare Metal Whitebox switches? The answer is, really easy. Since MAAS is using a Web backend based on Apache2, it has the default directory structure for Apache2. So in /var/www/html I can put my ONIE images for my switches in that location. Also, becuase MAAS is the DNS and DHCP server for my managed devices and servers, it is a no brainer on using this to deploy whitebox switches.

    Typically, when deploying ONIE images on to a Whitebox switch, Network Administrators have a couple options. They can either use a USB thumb drive with the ONIE image burnt on it and restore it via the ONIE Rescue option in the ONIE GRUB Boot menu and then typing install_url file:///path/to/onie-installerand then it install, but that is only efficient if you are deploying maybe 1-5 switches. As a Network Engineer, if I have to leave my seat to reset and update my switches, that is unsat. And if I’m carrying my “serial leash” over my shoulder, that is a walk of shame…

    The other option is to use the Network Boot option, which is the default way of deploying a NOS onto a Whitebox switch. This is the automatic option, but it does depend on a couple of things:

    1. The ONIE image is named specifically for the device, of example, a Celestica Redstone XP switch has the default ONIE installer image name of onie-installer-x86_64-cel_rxp_sxp-r0 and if it can’t find that specific image, it starts decrementing down to onie-installer-x86_64-cel_rxp_sxp to onie-installer-x86_64 until it can find an image. Then it checksums that image to make sure that it will work on the device based on the machine.conf.
    2. That the DHCP server is also the web server that is hosting the image. Now this is subjective, because you can have the default-url set in your DHCP server to point to the location of the ONIE images.

    As you can see, there a pros and cons to both deployments. Now to get why I like MAAS to do this.

    1. MAAS is a DHCP, DNS, and Web server all in one pretty package. I can plug my whitebox switch’s management port into the network that is managed by MAAS and set it up as a Device in MAAS so that I know what the IP address will be.
    2. I can put the ONIE image directly on MAAS in the /var/www/html directory and ONIE will automagically pick it up and install

    One thing to note, is that I cannot directly manage the switch from MAAS. Meaning that I cannot use MAAS to configure the NIC ports, and I cannot use MAAS to setup local users on the device or use MAAS to deploy an OS from the list of installed images on my MAAS server. Now there are plans that this functionality will come in the future, but it will not be based on ONIE images, and instead be PXE installed and managed by MAAS and specific images that are switch supported. This is outside of the scope of this blog entry, but as soon as they do become available, you can bet I will write a blog entry on how to do that.

    So, to get MAAS to deploy your whitebox switches, these are the steps:

    1. Copy your ONIE installer images to /var/www/html on the MAAS server.
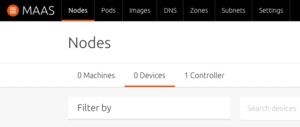
    2. Under the Node tab, there is a Devices option at the top of the Web page, click that and enter the MAC address of the switch, as well as the name you want to give the device and the IP address if you don’t want to have a dynamic address assigned to the switch. I highly recommend that you set a static so that you don’t have to guess what the address is of your switch to manage it in the future.
    3. Power on (ie, plug in) the switch
    4. On the serial console of the switch, watch as the device comes online and starts ONIE, it will by default go into ONIE Install OS and start the install process
    5. When complete, the switch will reboot and the NOS will start up
    6. SSH into the switch via the static IP address that MAAS assigned to it
    7. You’re done.

    So now you can use MAAS to not only manage your servers, but it can deploy your NOS on to your Whitebox switches. You can also use this procedure for upgrading the NOS using ONIE on your Whitebox switches.

    DISCLAIMER: This is not supported by Canonical. If you try this and it doesn’t work, you cannot contact Canonical for support. They do not support ONIE or  the NOS’s that are deployed on the switches that are not running Ubuntu. This article is just showing that you can use MAAS to do this if you so wish to be able to have this and not have to have a separate server to deploy ONIE images from and have a one stop shop for your infrastructure deployments. While this should not impact MAAS functionality or deploying other services through MAAS, you are making changes to the directory structure that is not supported by Canonical.

    I wrote this article because I have had many Network Engineers and Admins ask if they could use MAAS to deploy ONIE images, which yes, you can, but Canonical will not support it since it is not a Canonical supported deployment method.

    If you have any questions, or just want to say “Great article” leave a comment!

    Thanks!